
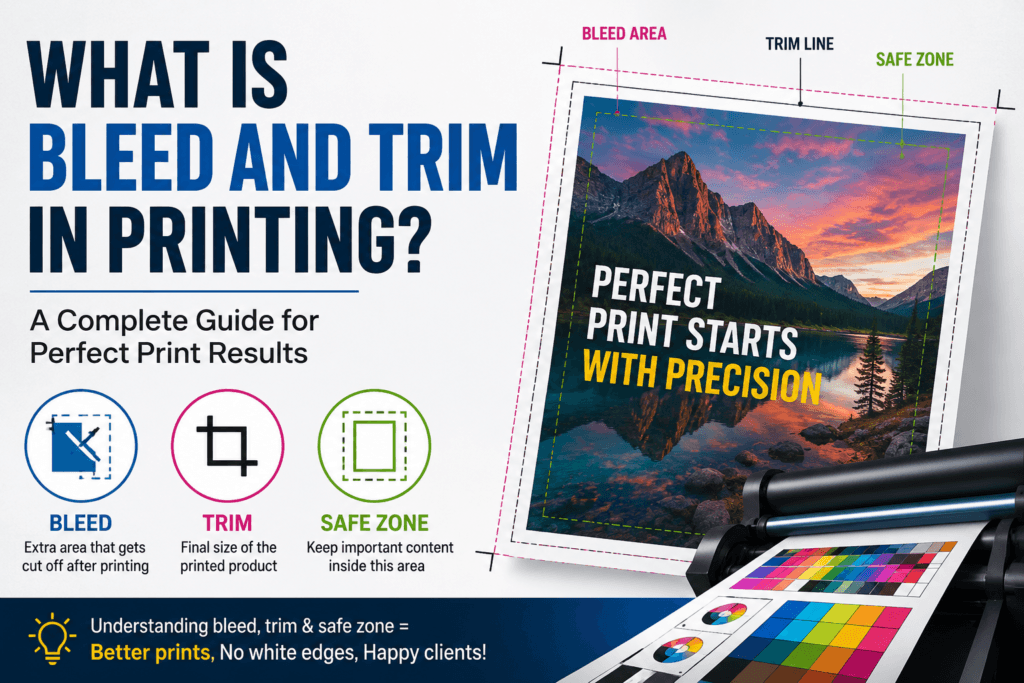
Understanding what bleed and trim mean in printing is essential for anyone working with graphic design, printing, branding, or packaging. Whether you are designing business cards, brochures, flyers, or custom packaging, ignoring bleed and trim can lead to unwanted white edges, misaligned cuts, and unprofessional print results.
What is Bleed in Printing?
Bleed in printing refers to the extra area of your design that extends beyond the final cut size of the document. It ensures that when the paper is trimmed, there are no unwanted white borders around the edges.
In real printing production, paper is printed in large sheets and then cut down to final size. Because cutting machines are not 100% precise, even a small shift can leave thin white lines if no bleed is added. That is why designers extend background colors, images, or patterns beyond the trim edge.
For example, if you are designing an A4 flyer, you typically add 3mm bleed on all sides. This means your design becomes slightly larger than A4 so that the final trimmed result looks clean and professional.
Bleed is especially important for designs that have full background colors or images touching the edges. Without it, even a small cutting error can ruin the visual quality of your printed material.
What is Trim in Printing?
Trim is the final size of your printed document after it has been cut down from a larger printed sheet. It is the exact finished size that the customer receives.
For example, if you are designing a business card, the trim size is usually 90mm x 54mm. Anything outside this area belongs to the bleed or safe zone and will not be visible in the final product.
Trim marks are often added to print files to guide the cutting process. These marks show the printer exactly where to cut the paper. However, modern printing workflows use automated cutting machines, so digital guides are more commonly used now.
Understanding trim size is important because it defines the final appearance of your design. If you place important text or logos too close to the trim edge, they might get cut off during production.
Difference Between Bleed and Trim in Printing
The main difference between bleed and trim lies in their purpose and position in the design file.
Bleed is the extra area outside the final design that ensures no white edges appear after cutting. Trim is the final cut line where the actual product size is achieved.
Bleed acts as a safety extension, while trim is the actual boundary of the finished product. Designers must always keep important content inside the safe zone, away from the trim line, while extending background elements into the bleed area.
A simple way to understand it is that bleed gets cut off, and trim is what remains after cutting.
Why Bleed and Trim Are Important in Printing
Bleed and trim are not optional in professional printing. They are essential for maintaining print quality and ensuring that designs look accurate and polished.
Without bleed, even a minor cutting shift can cause uneven edges. Without a proper understanding of trim, important elements like text, logos, or QR codes can be accidentally removed during the cutting process.
For businesses, this can result in wasted printing costs and damaged brand reputation. For designers, it can lead to client dissatisfaction and repeated revisions.
Using correct bleed and trim settings shows professionalism and ensures that your design is production-ready from the start.
Standard Bleed Size in Printing
Most professional printing companies recommend a standard bleed of 3mm to 5mm on each side of the document. However, this can vary depending on the type of product and printing requirements.
For example, small items like business cards usually use 3mm bleed, while large format prints like banners may require more.
It is always best to check with your printing provider before finalizing your design. This ensures your file matches their production standards and avoids unnecessary rework.
Safe Zone and Why It Matters
Along with bleed and trim, another important concept is the safe zone. The safe zone is the inner area where all important content should be placed.
This includes text, logos, contact details, and any critical design elements. Keeping content inside the safe zone ensures that nothing gets cut off during trimming.
A common rule in design is to keep important elements at least 3mm to 5mm away from the trim line. This gives enough margin for cutting variations and ensures consistency in the final output.
Common Mistakes Designers Make with Bleed and Trim
Many beginners make simple but costly mistakes when preparing print files. One of the most common errors is not adding bleed at all, which leads to white edges after trimming.
Another mistake is placing text too close to the trim line. Even if bleed is correctly set, improper content placement can still ruin the final design.
Some designers also forget to convert their files to the correct print format or ignore printer specifications, leading to rejected files.
Avoiding these mistakes not only improves print quality but also builds trust with clients and printing companies.
How to Set Bleed and Trim in Design Software
Most professional tools like Adobe Illustrator, Photoshop, and InDesign allow you to set bleed and trim during file creation.
When starting a new document, you can enter the bleed value in the setup window. This automatically extends the canvas area beyond the trim size.
You can also enable guides to clearly mark safe zones and trim boundaries. This helps you visually organize your layout and avoid mistakes.
Always export your final file in PDF print format with bleed and crop marks enabled for best results.
Conclusion
Understanding what bleed and trim mean in printing is essential for creating professional-quality print designs. Bleed ensures that your design extends beyond the cut line to prevent white edges, while trim defines the final size of your printed product.
When both are used correctly along with a proper safe zone, your designs become print-ready, accurate, and visually clean. Whether you are a beginner designer or running a printing business, mastering these fundamentals will significantly improve your output quality and client satisfaction.
FAQS
1. What is bleed in printing?
Bleed in printing is the extra area added outside the final design size. It ensures that when the document is cut, there are no white edges and the design goes fully to the edge.
2. What is trim in printing?
Trim is the final size of your printed document after it has been cut. It is the exact finished product size that you receive after printing.
3. Why is bleed important in printing?
Bleed is important because printers cannot cut paper with 100% accuracy. Without bleed, even a small cutting shift can leave white borders or unfinished edges.
4. How much bleed is usually required?
Most printing companies use 3mm bleed on each side, but this can vary depending on the project type, such as business cards, flyers, or banners.